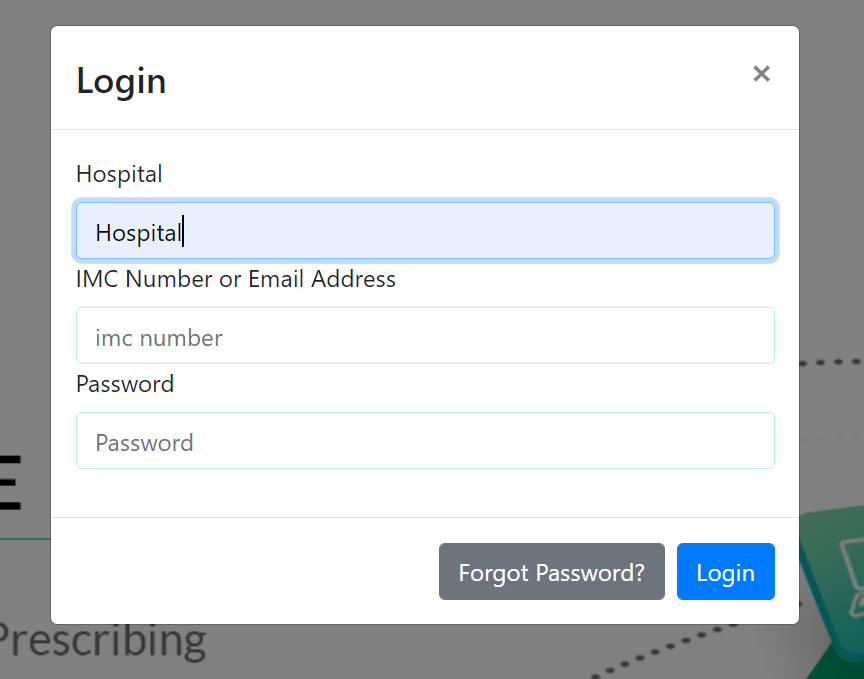
Logging In to ClearScribe
Your pharmacy or IT department will set you up with an account to access ClearScribe. You will receive an email to set your password for the first time. This link is only valid for 24 hours, so if you try to use it after that time, you will receive an error message. Once you have set it, from then on you can login using your email address or your IMC number and your chosen password.
You navigate to the ClearScribe Web Application and you’ll land on the ClearScribe splash screen. Click the big login button and you’ll be prompted for your details.
Prescribing
Enter Patient Details
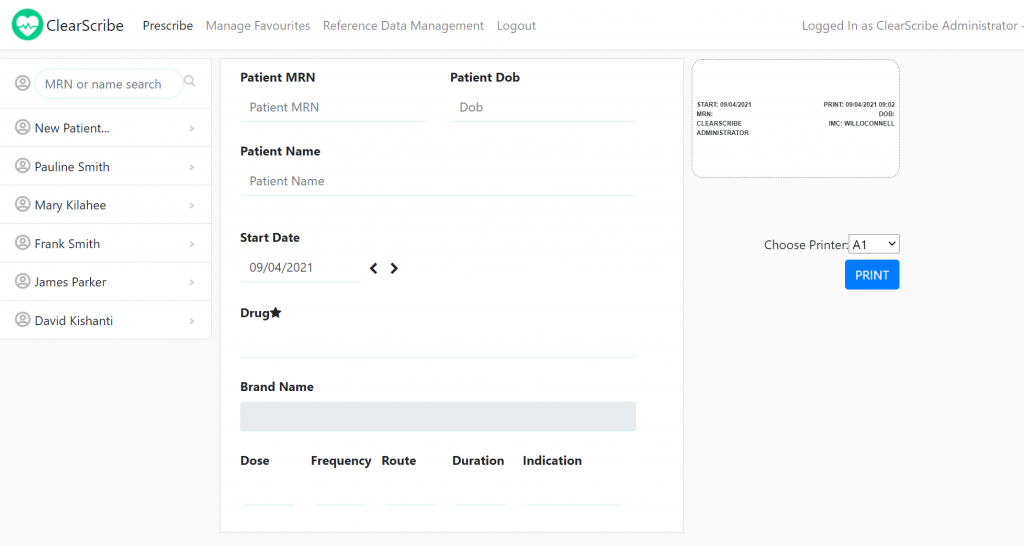
The main prescribe screen is presented when you log in. First, you enter patient details either by choosing a pre-existing patient from the list on the left, or click the New Patient button if you can’t find the patient you are looking for. Note you can search for a patient by name or MRN to quickly find a patient. The search is a “contains” match, meaning a search for “line” will find a person called “Pauline” and a person with a surname “Linehan”.
Once you click the print button to actually print a label, the patient details get saved to the list. Note that for security (GDPR) reasons, ClearScribe does not store the patient details on the ClearScribe servers, instead this information is held only locally on the PC you are logged into, within the local storage of that browser. This means that if you log in to a different PC or laptop, you may not see the same patient list.
Enter Drug and Instructions
Having chosen a patient, the cursor moves to the Drug field. This is a search box that allows you to choose from the medications available within your organization. This list is maintained by your pharmacy department – if you think a drug is missing from the database, you can send a request email to your pharmacy department to have it added.
To select a drug, enter the first 5 characters of either the brand or generic name for the drug and you will be presented with a list of options that match.
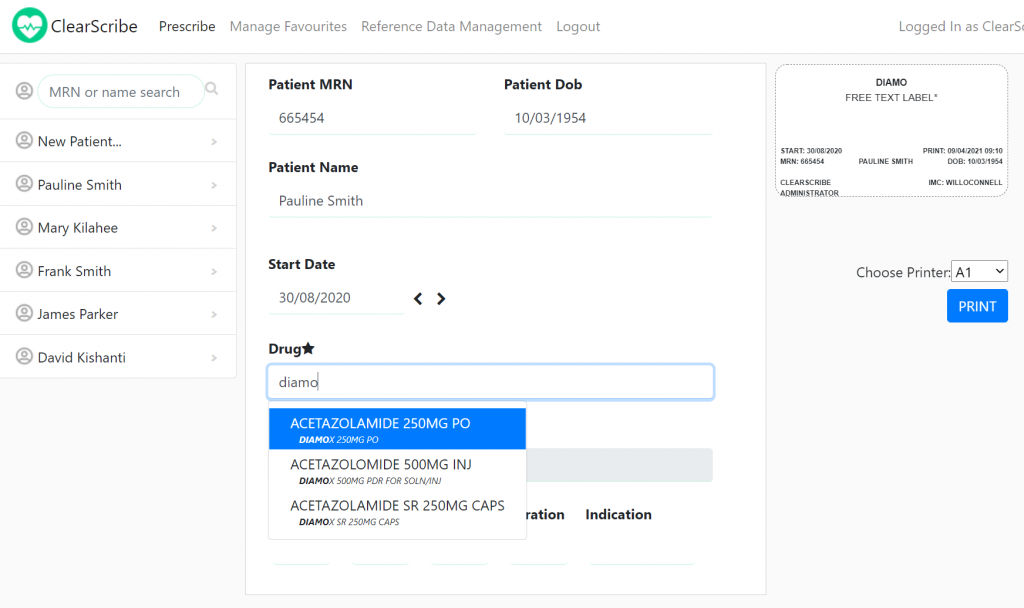
You can either use the mouse to choose a match, or press up or down on your keyboard and then enter to select one. Once you select one, the cursor moves to the Dose field.
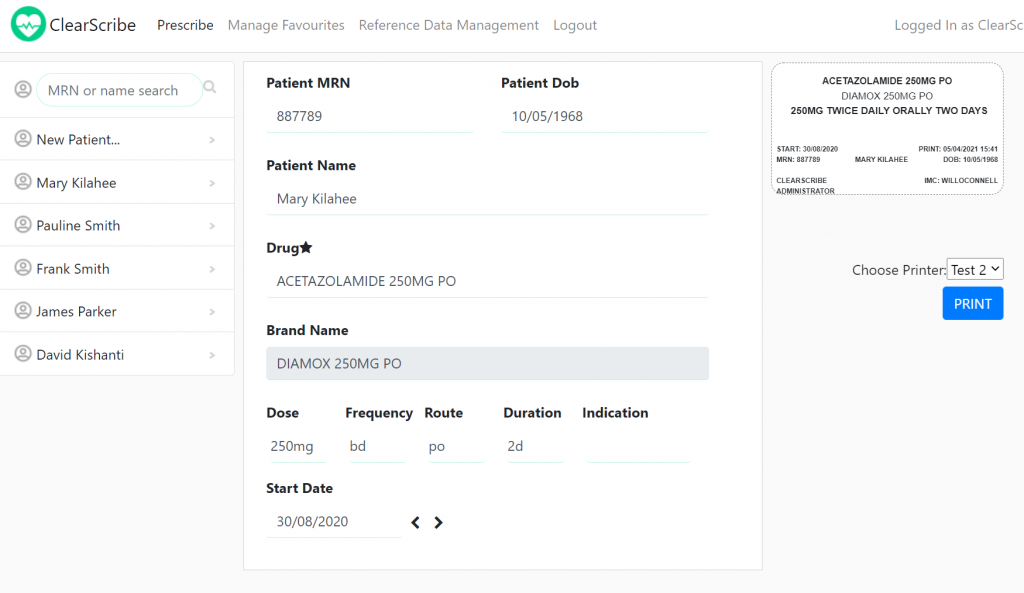
When entering the dose, frequency, route, duration and indication, you do have the option to use “short codes” to save time entering. Your pharmacy can provide you with a list of these, in an upcoming release we will provide these via a helpful panel directly in the prescribe screen. As you enter data, notice the label preview on the right hand side of the screen, which gets populated as you make changes. This is an indication of the label content so you can be sure you are going to print the correct information.
If you cannot find the drug you are looking for, you can free text in the name of the drug. Note that the brand name will show FREE TEXT ENTRY*. Please inform your pharmacy department if there is a drug that you feel should be in the database.
Note that entering PO for route translated to “ORALLY” in the label. You do not need to use the short codes, you can also just type in full words in any of these fields.
Favourites Module
What is the Favourites Module
Within a hospital there are certain prescribing roles that often end up prescribing the same combination of medications many times – a good example is a theatre anesthetist. The favourites module allows the prescriber to set up different “Favourites” which each can have a “cocktail” of drugs and instructions. Then, when they need to use one of them, they can be extremely efficient at printing out the perfectly legible medication instructions for the patient Kardex. The favourites module is an add-on to ClearScribe, so you may or may not see it in your application. If you feel it’s a feature you would wish to use, contact your pharmacy department to add the module to your instance of ClearScribe.
Where do my Favorites Come From?
Your favourites will get set up for you by your Pharmacy Department. This is to ensure consistent application of drug dosages and instructions. The pharmacist assigns the favourite to your user account. From then on, when you are on the Prescribe screen, you see a star bedside the Drug label.
First select the patient you wish to print a label for and enter the correct Start Date for the labels. Next click on the star, you will see a list of your favourites. A favourite is a logical grouping of several drugs with the associated directions, so you just have to hit the print button to get all the labels.
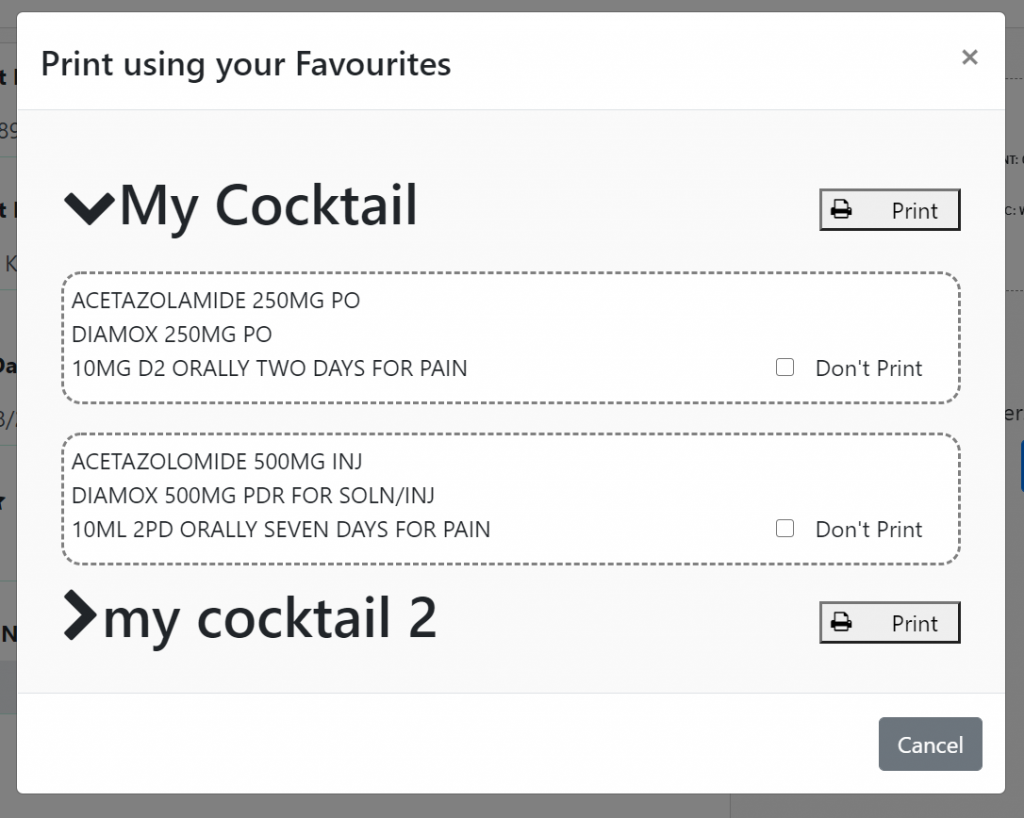
If you expand a specific favourite (My Cocktail in the screenshot above) by clicking its name, you see the list of drugs within that favourite. By default, all the drugs will print, however you can prevent some from printing if you want by checking the “Don’t Print” option next to any drug, then click the Print button for that favourite. Note that the Print button is beside the favourite name.
Screen Timeout
If you leave the ClearScribe application idle for 2 minutes, it will automatically logoff and bounce the screen back to the login screen. This is for safety reasons to help ensure that no one prints labels on behalf of another user. Each label has the logged in users IMC number on the label.